Saturday, December 24, 2016

Designer Wood Watches from JORD

*This post is sponsored by JORD Watches 

Merry Christmas Eve! This month has absolutely flown by! 
I am thrilled to be sharing about this gorgeous watch from JORD. I have always wanted to gift my husband a watch, but I wasn't sure what direction to go. Luckily, JORD Watches reached out to us to select from one of their beautiful designs. 

JORD Wooden Watches

My husband and I had never heard of JORD Watches prior to browsing their selection. JORD watches are handcrafted, wooden timepieces that demand to be seen with their modern and stylish cuts. 

JORD watches are available in both men and women's unique styles. 

The watch my husband chose is the Ebony and Copper design from the Dover Series. 


When the package came, I was completely blown away by how gorgeous this piece is. My husband, Clay, is here today to share with me below! Ladies, if you are wondering what the man in your life may think about a JORD watch, look no more! 


I've never been much of a jewelry person (I think my own wedding ring makes my hand look a little too busy…) but watches are more like a gray area in my opinion.  They at least serve a purpose outside of aesthetics and generally don’t look too gaudy or flashy.  I’ve never owned a quality watch in my life, either, so I figured this would be a good opportunity to at least test the waters and find out if I’m a watch kind of guy.
Initially, I put the watch on my left wrist.  Big mistake.  Two pieces of jewelry (including the wedding ring) on the same hand gave me anxiety and I felt like it was all I, or anyone else for that matter, would be able to focus on.  I immediately moved the watch to my right wrist and that remedied the situation.  Thankfully it only took about 30 seconds to work out all the kinks. 


  I really like the lower profile of the dark wood compared to other shinier or louder materials.  The clear distinction between the dark wood and the actual timekeeping piece of the watch, consisting of several different metals, deserves appreciation, too; particularly, the copper inlay containing the numbers which accents the rest of the hardwood beautifully.  I also really like the exposed “innards” of the watch setting directly beneath hands.  Incredibly intricate and complex, the cogs and gears making up the actual timekeeping piece of the watch are in full view presenting a neat technological disparity between them and the wooden band.  The minute and hour hands are also painted blue which adds a nice splash of color to make the whole thing stand out a little and make it more interesting. 

Overall, the watch is really solid. Looks alone would be enough, but it’s also comfortable and light.  It hasn’t been ripping out arm hairs (a very legitimate concern of mine) and doesn’t make any jangling noises when I walk around (another very legitimate concern of mine.) The JORD wooden watch is definitely highly recommended. Two thumbs up!

My husband LOVES this watch! It is manly, yet modern... and one of the most unique designs I have ever come across. Not to mention.... their packaging is absolutely beautiful! 


From my perspective, I LOVE the designer look of the watch with the unique wooden parts. I think it looks amazing on my husband and I cannot recommend this piece to enough people! 

Which brings me to a very exciting point... We've teamed up with JORD Watches to offer a $25 discount. You can receive your code instantaneously by clicking HERE

The JORD wooden watch would make an amazing present for that special someone... or to treat yourself after the holidays! Head over to JORD Watches to browse their designs!

Special thanks to JORD watches for their beautiful designs and for sharing them with us over the holidays


Wooden Wristwatch

Thursday, December 1, 2016

life update


Hi everyone! 

A few things: pregnancy is crazy. I realize I sound like everyone else, but I seriously had no idea how drastically my life, body, and emotions would change as I started growing this little babe!

Don't get me wrong, I am overwhelmed with happiness. 

I am also overwhelmed with a lot of things. Everything. The emotional toll (and physical, obviously) is the real deal. 

Today I am 20 WEEKS PREGNANT! That's halfway for those of you who aren't keeping up! :)

I thought it would be fun to do a little questionnaire! 

How far along: 20 weeks

Total weight gain: I really don't know. I don't keep a scale at home and I gained about 4 pounds between my first two appointments. More info on that to come for sure. That being said, I am POSITIVE I have gained weight. :) 

Maternity clothes: My favorite thing in the world. How many times in your life do you get to wear maternity pants to a Thanksgiving dinner? But seriously. I am still wearing most of my regular pants. I CAN button them, but not comfortably. It's either maternity pants or a belly band for me. Or leggings. Luckily, the current style is perfect for this stage of pregnancy. I can still wear most of my flowy tops and tunics. 

Stretch marks: (knock on wood) Nothing yet! Though I am told all of my efforts to rub creams, oils, etc. have NO bearing.... I still do it religiously. 

Sleep: This has recently become an issue. I went from barely being able to stay awake throughout the day to extreme bouts of insomnia. It's not uncommon for me to wake up at 2:30 AM and lay there for a few hours. Add in the nightly bathroom breaks and.... yeah. 

Miss anything: Hmmmm... every now and again I think a nice cocktail sure would be lovely. Or a glass of wine. Oh, and sleeping on my stomach sometimes. But it all pales in comparison to the joy I get in daydreaming about baby. :) 

Movement: UGH! I can't feel ANYTHING! There were a few times where I thought maybe...MAYBE it was him. But I want to be sure. And nothing "sure" yet. 

Food cravings: No serious cravings, just serious hunger. When I am ready to eat, it is NOW. 

Anything making you queasy or sick: Still weaning off of the Diclegis train. Every now and again I will get a little "gaggy" but overall, MUCH better! 

Have you started to show yet: Absolutely. 

Gender: Sweet little boy!

Labor signs: Negative, thank goodness!

Belly button in or out: I have actually noticed it seems to be pushing out! It's not OUT out, but it's heading that way! So bizarre to look at! 

Wedding rings on or off: On!

Happy or moody most of the time: Happy but SO emotional. I am feeling everything at a very new level. Yikes. 


Looking forward to: Christmas! Seeing family for the holidays and upcoming gatherings. 

Thanks for hanging out with me for a little Q & A! This season of life has been so full... in every regard. I cannot wait for everything to come!

 To all the other mamas out there, I recently started my baby registry! There are so many helpful checklists out there, but I still love input from my friends and ALL OF YOU! So, tell me, what are your must have baby registry items? 

Have a GREAT weekend!


Thank you to Scottsdale Mom's blog for the questions!

Friday, November 25, 2016

Omaha Stork review & giveaway + {gender reveal}


Happy Black Friday! I am not much for Black Friday shopping (at least not as die hard as many people that I know) so today is just a lovely day off for me...and the perfect opportunity for me to share this exciting post! 

I can't remember the last time I have been so thrilled about a blog post... but that's exactly where I am at today. A few months ago, my friend and fellow blogger Abigail (Acreage of Grace) shared about her experience at Omaha Stork Vision. Though I live and work in the area, I had NO idea Stork Vision existed! At the time, I knew I was pregnant, but the only other person who knew this was my husband. We were bursting with excitement over our secret, and I knew that I wanted to find out more about Stork Vision as soon as possible. 

Fast forward a few months and I can finally say I was able to to have this miraculous experience. AND we now know the sex of the baby! And, as if that isn't exciting enough, Omaha Stork Vision has graciously offered a session giveaway to a lucky reader! (Scroll down for giveaway details!)

Stork Vision Omaha is the only free standing prenatal imaging center in the Omaha metro area. They offer clients the latest technology in 2D, 3D and 4D (LIVE!) ultrasound services for parents. They will even do gender reveals as early as 17 weeks! So, for those of you who simply cannot wait until that anatomy scan, Stork Vision is for you! Side note: you CAN utilize their services without finding out the gender of your baby. 

Scheduling an appointment with Stork Vision is insanely easy. You can call, email, or schedule on their website. My appointment was scheduled within a few days of contacting them....and from there we just had to wait! 

The entire day of our appointment, I couldn't think about anything else. I knew that in a few short hours, the precious baby growing inside of me was going to be a BOY or a GIRL and that information made the whole pregnancy so much more real

Stork Vision allows you to invite friends and family (the amazing living room atmosphere is set up with comfy couches and a giant big screen TV for ultimate viewing). We opted for it to just be the two of us. Clay and I were both so nervous and excited. Cathy, of Stork Vision, explained to us exactly what would happen during our session. She told us that she would take a few photos that would be sent to our doctor, and then she would find out the gender. Once she knew, she asked us if we wanted to know. 

We had discussed prior to our appointment that we wanted to find out if baby was a boy or a girl. Cathy explained to us what we were looking at and...

IT'S A BOY! 

I cannot say enough good things about Stork Vision Omaha. They made us feel so comfortable and you can tell they REALLY care about their clients. I had no idea what a memorable experience it would be... it was truly amazing. I had tears in my eyes watching our little one squirm around. And finding out that it's a BOY was just the cherry on top! Cathy took great time and care to snap numerous pictures of our sweet boy. I have never felt such an overwhelming happiness! We cannot wait to welcome our little guy in April. 


Sucking his thumb! This one kills me every time. 


A few additional things about Omaha Stork vision: they do NOT replace the care of a physician. In fact, you must be under the care of a prenatal health provider. You do not need written consent, but you do need to bring in proof of care (in the form of an ultrasound photo, prenatal appointment card, or prenatal prescription). 

For more specific information about Stork Vision ultrasound VS a medical ultrasound, please click HERE


And now for the exciting part! 


First off, a BIG thank you to Stork Vision for giving us this amazing experience. I am so excited that a reader will get to have the same! Stork Vision has offered one lucky reader this amazing package:

-3D/4D scan
-CD of all saved images
-DVD of entire ultrasound
-Printed ultrasound photos
-Heartbeat animal of your choice with your baby's heartbeat recording inside!

This is an INCREDIBLE package (valued over $225!) 


TO WIN:
"Like" Omaha Stork vision on Facebook HERE.
"Share" this post on your Facebook. 
TAG someone in the comments section who may be interested in winning!

Keep in mind, you do not have to be pregnant to enter! Wouldn't this be an amazing gift to surprise someone with? With Christmas just around the corner, I can't imagine a better gift for an expectant parent! 

The giveaway starts NOW and ends December 17th. Winner will be announced Monday, December 19th.

GOOD LUCK! 


This post was sponsored by Omaha Stork Vision

Saturday, November 5, 2016

{life update} + Fall excitement

Happy Saturday everyone! I am trying to savor these (what I assume) are the last warmish days of Fall. I love the beginning of the cool temps and Nebraska is absolutely gorgeous right now! Yesterday I took a little bike ride around our neighborhood and the trees are perfect.  Fall really is the best time of year. 

On that note, this Fall has been just a little bit different for us! Basically, the real reason my posts have been so few and far between is because…


We're having a baby! 

We could not be more excited! 


And neither could Brick! :)


The last few months have been quite the ride! 
We found out that I was pregnant in early August. The first few weeks were so exciting and I was absolutely dying to get to my first doctors appointment. Soon after that (around 8 weeks) I started to get extremely sick. The thought of looking at my computer screen or even scrolling on my phone would make me nauseous. Basically, everything made me nauseous. 

I was surviving on Sprite and crackers and really just trying to get through my day! And the tiredness… what?! I knew pregnancy would cause me to be fatigued but I had NO IDEA! I couldn't hardly get to the end of my workday without a nap. 

The good news is….well, a few things. The good news is Diclegis exists. The second good news is that I am now 16 weeks and seem to be getting a little more energy back :) . 

For those of you who have taken Diclegis… it truly is a miracle medicine! Absolutely nothing as far as the typical natural remedies would work to control my nausea. My entire day was spent in a constant state of dizziness or dry heaving. And let me tell ya… it's nearly impossible to get anything done when you feel that way!

We are ecstatic to welcome our little chubby {I'm only assuming} baby into the world this Spring. I am due April 22nd (one day after my birthday!) 

In a few short weeks we can find out the gender… and we will! We are dying to know if it's a BOY or GIRL! 

Thank you to everyone who has emailed and/or still checked into the blog during my extremely absentee period. Hoping, as we continue into the second trimester, I can gather more energy for posts. 

Mostly, we are so thankful and excited that we get to be parents. YAY! 

xoxox 


Thursday, October 27, 2016

how to {do your own blowout}

Blowouts are all the rage. And for good reason… having someone else wash your hair and give you the smoothest, most voluminous style (with no effort!)… Yes please! If you love getting blowouts and have wondered how you can achieve the look at home, look no further!

The lovely Ally from Lark Blow Dry is breaking down the how- to of a blow out. Step by step we will show you how to achieve that coveted "fresh from the blow bar" look! 

{for the purpose of this post, this blowout is brought to you Bumble and bumble and I will be referencing their products; please feel free to use similar products when trying this out!}


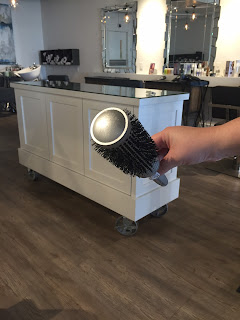
1. Post washing, prep hair with a detangler/primer all over your damp hair. For this demonstration, we used Bb. prep spray, which I must add… smells amazing! Next, your hair needs to be combed out and detangled. Ally, who is a professional,  and I (who simply swear by it) HIGHLY recommend investing in a Wet Brush for this step. This brush will change your life. If you have long hair, especially, do yourself a favor. 


2. Next, your hair needs to be rough dried before you can start the blowout process. Rough dry means that approximately 75-80% is completely dry. Ally tip: blow dry your hair going the same way as the hair shaft. Meaning, keep the blow dryer pointed away from your roots. From roots to midshaft, Ally recommends applying a styling cream to create volume. For bottom half of your hair, a thickening mousse is key. While blow drying, use your hands or the brush, but make sure you REALLY get your roots dry. 

Don't mind my mad face, ,just very focused!


3. Once your hair is about 75-80% dry, split into sections as pictured. To split your hair, always start with the top. You can measure this by going from the outside of your eyebrows and back. Measure the section by using the round brush of your choice. The subsections should be roughly the size of the end of the round brush. (Is everyone learning a lot? Ally is wealth of knowledge. I had no idea!) When you finish you should have 4 large sections. 


4. Blow dry each section with the blow dryer under the hair shaft. Ally tip: tension is key! Using the round brush, pull the strand at a 90 degree angle away from the head. For the bottom section, which is where you will start, this is not necessary. But as you move up your head, and want more volume, the direction you pull the hair from your head will determine volume. Pulling the strand straight up while brushing away from the head will create the most dramatic volume. Roll the round brush while pointing your blow dryer down on the hair shaft. 


5. Repeat each section moving up to the top. Remember, the crown of the head (the two top sections) are where you want the MOST volume. Ally tip: Use the heat AND cool shot on your hairdryer to set each section. 


6. Use your fingers to break up the waves. Ta da! 


You just completed your first at home blowout. Does your arm hurt? Most likely. Especially if your hair is long! But it's totally worth the results. 

Do you do your own blowouts? What tips do you have? Let me know in the comments!

If you are in Omaha, and haven't experienced an in-house blowout, contact Ally at Lark! You will not regret it! Plus, she is a wealth of knowledge and will send you on your hair with beautiful hair AND information. 


Saturday, October 1, 2016

lash extensions {a dream come true}

I am so excited to be writing this post - for several reasons. ONE… because I have been completely off the map lately, and TWO… this is probably the most excited I've been about a post in a while. If you follow along at Sweet and Modern, you know I love trying out new products and bringing my favorite reviews to my readers. 

I've mentioned before that I've been dying to hop on the lash extension train, but wasn't sure if it was an affordable habit that I could keep up. Fast forward, and I found out that Tara @ Serenity Skincare is now doing lash extensions! Tara did my pre-wedding facial and also hooked me up with my current skincare line, TAO Organics (you can read more about that here!) In short, I trusted her with my lashes! 

The biggest appeal for me in getting eyelash extensions was to cut back on getting ready time, as well as looking (effortlessly) like I had put on make up. I am pretty sure every woman can relate to that! During my consultation with Tara, we discussed that mascara is not needed with lash extensions. In fact, it is discouraged as to lengthen the life of your lashes. Seriously, when was the last time you felt like you could go out without mascara on? For me, I draw the line at quick errands and working out. Otherwise, mascara is a staple. It makes me feel human, awake, and put together. So the thought of not applying it every morning? Yeah…super appealing. 

I admit, as much as I love a dramatic eye, I was a little nervous that I was going to roll out of my appointment looking like a Kardashian. Granted, sometimes there are occasions where this would be great! But for everyday work life, it's not really the look I am going for. Also, if you've ever had a bad experience with strip lashes, the though of having something semi permanent on your eyelashes can be daunting. Rest assured, having eye lash extensions is NOTHING like wearing fake eyelashes! 

Tara assured me that she would be doing a classic set on me. This means that there would be no volume enhancements, and it would simply be a lash for lash extension. The extensions are silk, light, and natural feeling. They are black, therefore they are able to darken up your current lashes as is. I was so impressed with Tara's knowledge of this art. It completely blows my mind how tedious it is, yet how easy she made it seem! (Note: there are options for volume with lash extensions)

A full set took about 2 hours long. I couldn't believe how fast the time flew by! It was painless... and the hardest part was laying on the table for 2 hours (which I really didn't mind…forced relaxation). Tara kept me up to date on my progress and explained what she was doing the whole time. In case anyone is wondering, your eyes are closed the entire time. No scary tools coming at your eyeballs! 

As the time dwindled down, I was getting super excited to see my lashes! At the end, Tara made sure my lashes were combed out and in mint condition before I could see them. Here is my before and after shot…


And here is a photo several days later! 

And… I'm not wearing mascara. Which is my favorite part!  :) 

It is safe to say that I am obsessed with having the extensions. I haven't worn mascara in days…which has literally cut at least 10 minutes out of my routine in the morning. The lashes are super easy to maintain (Tara gives you brushes, cleaning supplies and detailed aftercare instructions) and my only regret is that I didn't do it sooner!

Which brings me to this… I am SO ecstatic that Tara has decided to extend the most amazing special to Sweet and Modern readers. From October 3-31st, readers can book a classic full set PLUS a 2 week fill for $110! Ladies…this is a crazy good deal. A standard full set is regularly $135 and a 45 minute fill is $45. If you've been dying to try lash extensions, now is the time!

To book for a full lash extension set, contact Tara on her Facebook page and mention that you would like to book a full set under the Sweet and Modern special. You can also contact her by phone at (402) 215-7288. 
A BIG thank you to Tara for giving me such a wonderful first experience…and even more for offering readers this amazing deal! 

And to all of my readers, it feels great to be back in the blogging world! :) 


Serenity Skincare by Tara is located inside Salon DeMarco (Gretna, NE)
Disclaimer:
$110 must be paid at the time of the full set and fill must be scheduled at that time as well

Wednesday, September 14, 2016

guest post {makeup 101 - lipstick finishes}

Makeup 101- Lipstick Finishes (Guest Post by Kindly Unspoken)


Hey everyone! I’m so excited to be guest posting for Gina today! I’m Cara and I blog over at Kindly Unspoken. My posts mostly revolve around makeup and fashion, but I also have a serious sweet tooth and a love for baking, so I often share my favorite recipes as well. In addition to blogging, I work full time as a marketing professional, I’ve been a police wife for 7 years now, and I’m a mother of two adorable and rambunctious boys, ages 4 and 6. If you want to learn more about me and my blog, please drop in and say hello!


Makeup 101- Lipstick Finishes

As a lipstick lover, wearing lipstick seriously comes as second nature to me now- but I’m often reminded that not everyone is as familiar with all the different types and finishes, or fully comfortable in knowing how to wear them. So today, I’m going to be talking about the five main types of lip products out there, tips on application, and my favorite drugstore products of each. Let’s Get Started!
Lip-gloss (Sheer)- Sheer Lip-gloss of course is sheer in color, but adds a nice sheen and highlights the natural color of the lips. This is a great product for beginners and typically comes with a long tip wand or tube for easy application. This product can be worn alone or applied over lipstick finishes. I recommend this one by Wet n’ Wild for the perfect, glossy sheen.


Lip-gloss (Color Formula) - Color Lip-gloss, on the other hand, comes in a variety of shades and again adds a nice sheen to the lips while adding gorgeous color to the lips. This product is still fairly forgiving in the application process, and you can easily wipe off mess-ups if you “color outside the line”. NYX carries the absolute best butter glosses that look so gorgeous on the lips. My favorite is the shade cotton candy. 


Creamy/Satin Lipstick (Non- Matte) - Non-Matte Lipsticks (my favorite) are soft on the lips and super easy to wear. Unlike matte lipsticks, these lipsticks have a silky, sometimes even glossy, finish. These lipsticks come in a wide variety of color, and pair nicely with a full face of makeup. Unless you are working with a super dark shade, lip liner isn’t necessary when wearing this type of lipstick. If looking to add more sheen, lip-gloss (sheer or color) can be added to enhance the overall lip look, and make lips appear fuller. Rimmel Moisture Renew Lipsticks are my favorite in this category, as they have such a soft, velvety texture on the lips.


Matte Lipstick- If you’re looking for a more intense, full coverage lipstick, matte lipsticks are the thing for you. These lipsticks are shine-free and give a rich color payoff that is long-lasting. Matte lipsticks come in a variety of shades, and you will often find more intense, bold shades in matte lipsticks. These lipsticks are versatile enough that both risk takers and beginners will be able to find the perfect shade. While a fairly easy application, lips do need to be well-moisturized before applying a matte finish. In my opinion, Jordana carries the best selection of matte lipsticks, and at under $2 each, who can argue with that?


Lip Stain- Lastly, lip stains are the most long-wearing formula of all mentioned and “stain” your lips with an intense pigmentation of color. Typically, these products come in packaging similar to lip-glosses, and are applied with a precise applicator wand. The product will first appear as glossy and wet on the lips, but within seconds will dry to a matte finish. As with matte lipsticks, lips need to be well moisturized when wearing lip stains, otherwise any bit of dryness on the lips will show through. Smooch Proof Liquid Lip Stain by NYC Cosmetics is the best of the best in the drugstore market. This stuff will last ALL day and night- seriously, I love it!


For comparison purposes, here’s a shot of all the products (from bottom to top: sheer gloss, color gloss, satin lipstick, matte lipstick, lip stain)
So there you have it- the five main lipstick finishes! I hope this post was helpful in understanding the differences between each, and I hope if you haven’t already that you’ll give these products a try! I promise you, there’s the perfect lipstick out there for each of you just waiting to be found! ;) 
Let me know what your favorite lipstick finish is in the comments, and be sure and give my page a visit to check out Gina’s guest post on my blog today!

Have a great Wednesday!-Cara